Editing Scenarios
Instead of writing the XML files, Scenario Runner provides the feature to edit the scenario file through UI.
Creating the Elements
The basic functionality of creating the elements would be how to place the scenario objects (vehicle, pedestrian, miscellaneous) on the Map as well as how they behave in a certain condition.
Scenario Objects
There are two ways to create scenario objects (vehicle, pedestrian, miscellaneous); one is to use the main menu and click the link on Map. The detailed instructions are as follows.
1. Using the Main Menu
Vehicle (Ego or NPC) can be created through Edit >> Add Scenario Objects >> Vehicle
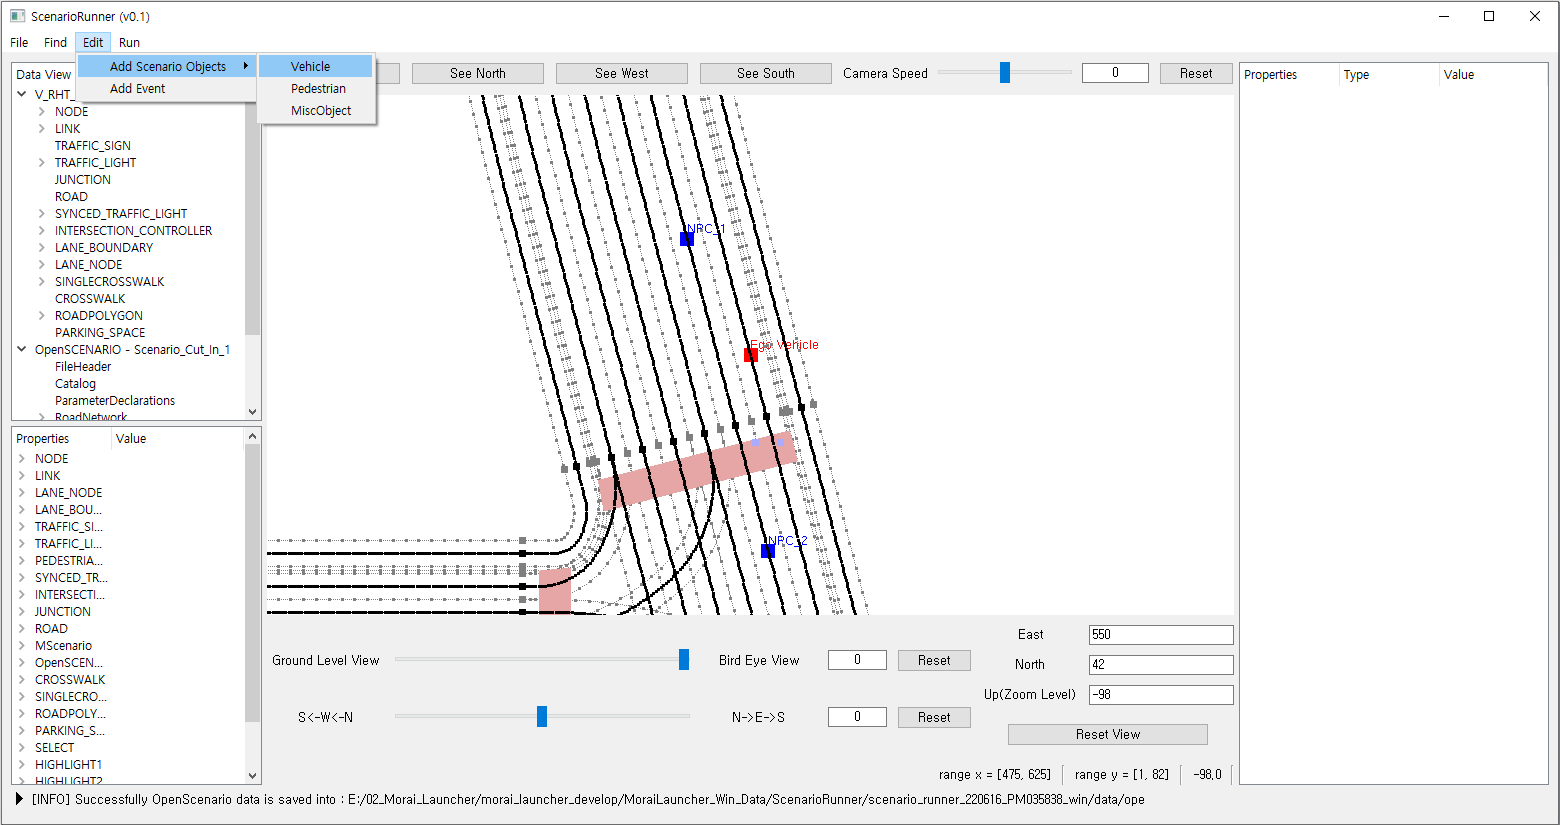
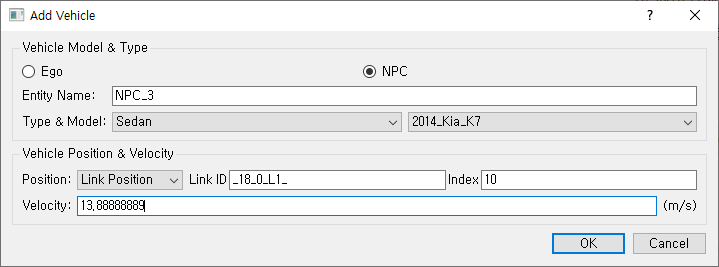
Then, create the vehicle by filling out the vehicle’s name, model, type, initial speed, and position.
With the current version, Scenario Runner can only support World Position and Link Position. If Link Position is entered, the heading of the vehicle is set automatically

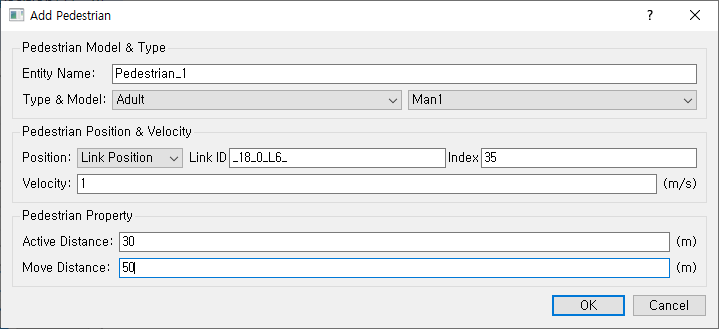
Also, pedestrian and miscellaneous objects can also be created using the same way.
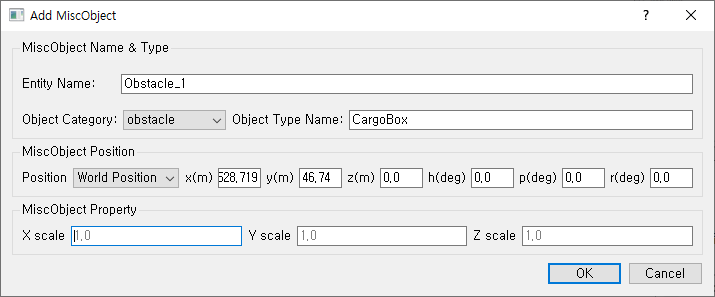
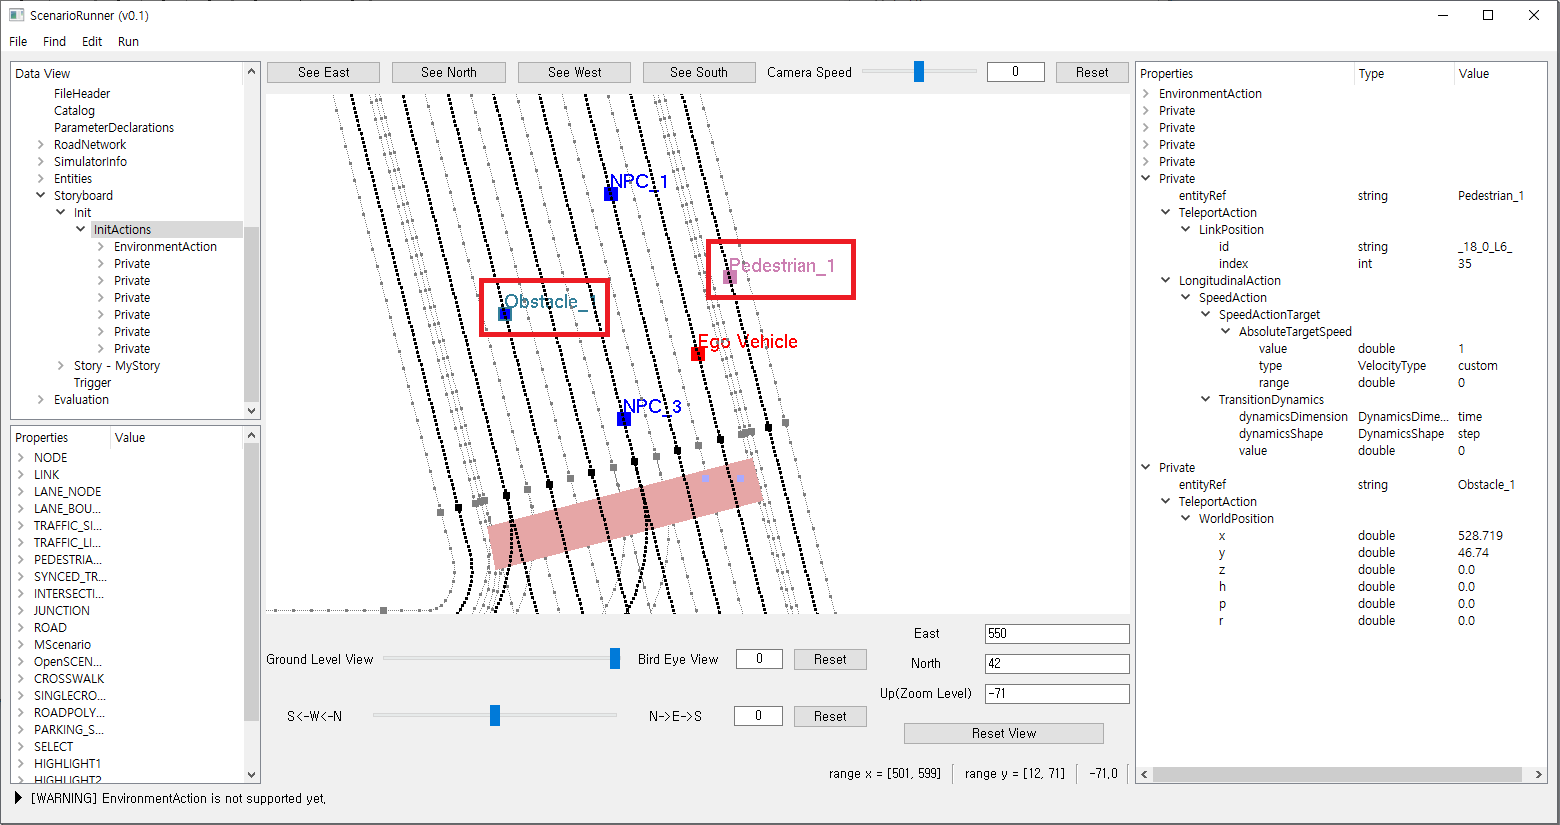
2. Creating the scenario objects via clicking the link point on the map
Click the
LINKonData View (top-left), then place the scenario objects in a certain position by using the keyboard (up & down).
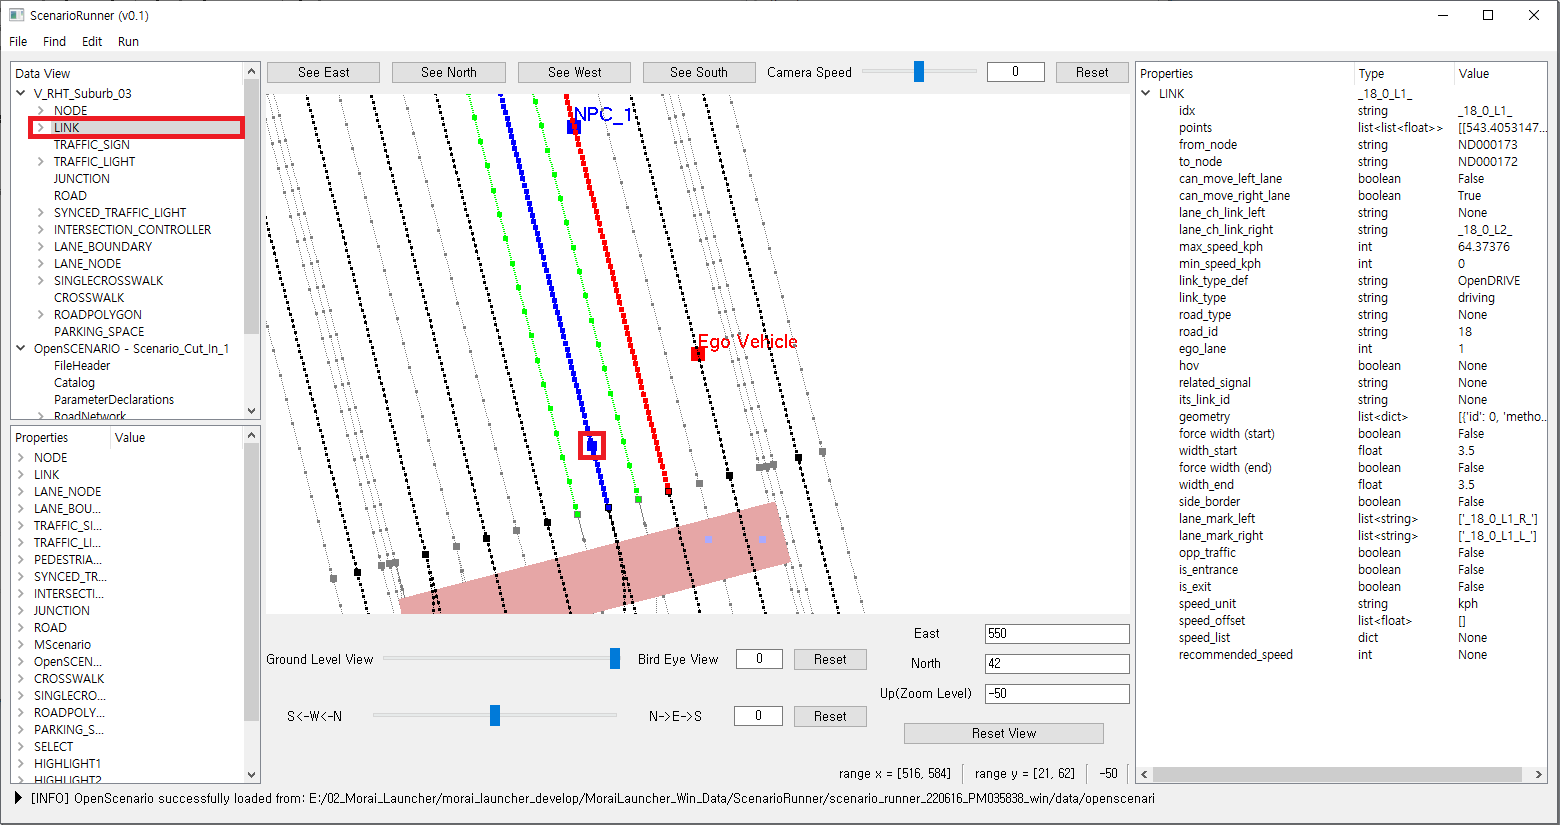
Using the right-click on the link point, scenario objects can be placed using the submenu name called
Add Scenario Object. In this case, the initial position is already set as corresponding to the point on the Map Data as shown below.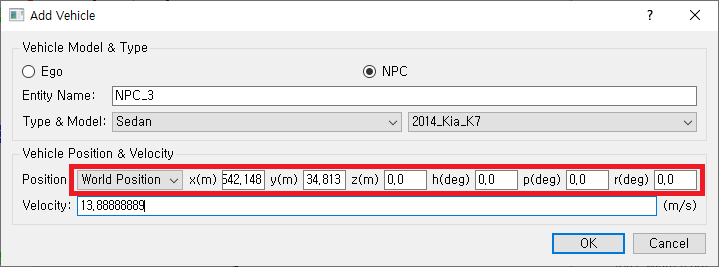
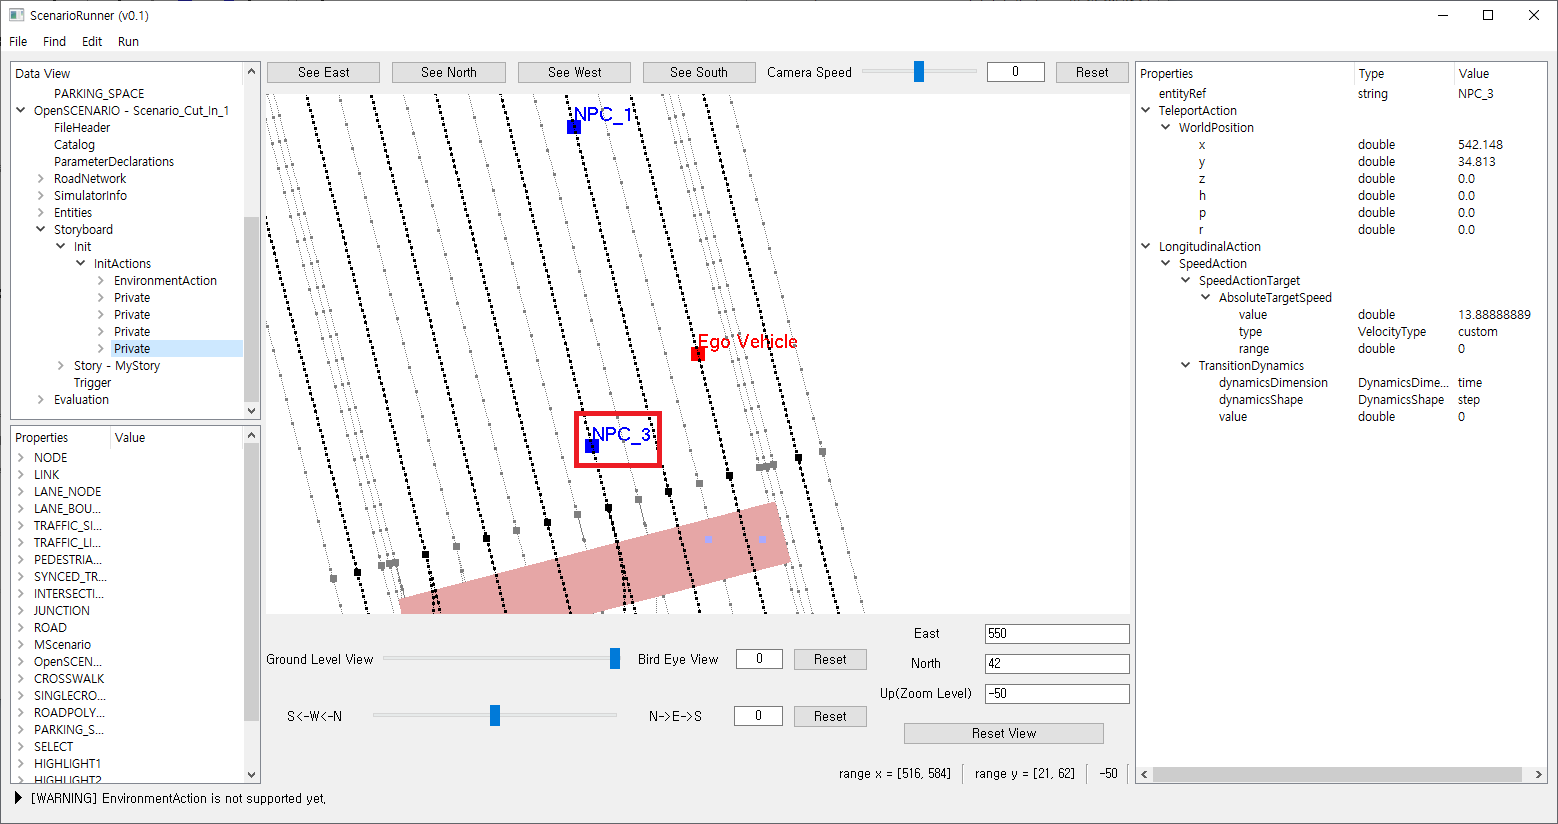
Event 생성
It is also important to control how the scenario objects behave in a certain condition, and that’s what the Event element allows the user to create the dynamic scene.
The Event element can be created using the Event UI through the Edit >> Add Event.
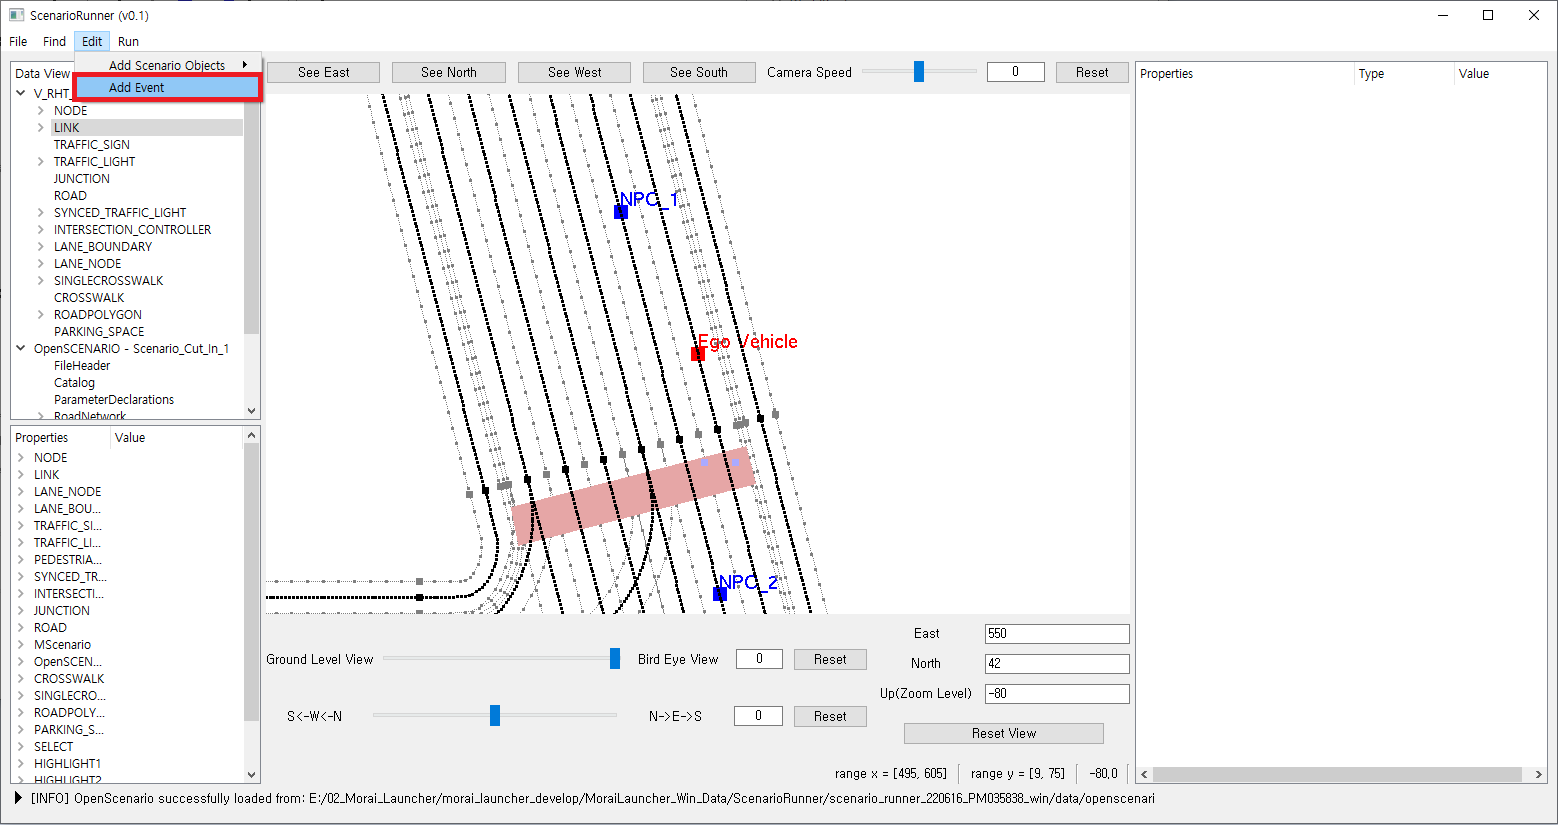
After filling out all the information required to create the Event, a new Event is created as shown on the
Data View (top-left). The event mainly complies with the ASAM OpenSCENARIO, and further details are available on this page: OpenSCENARIO Support
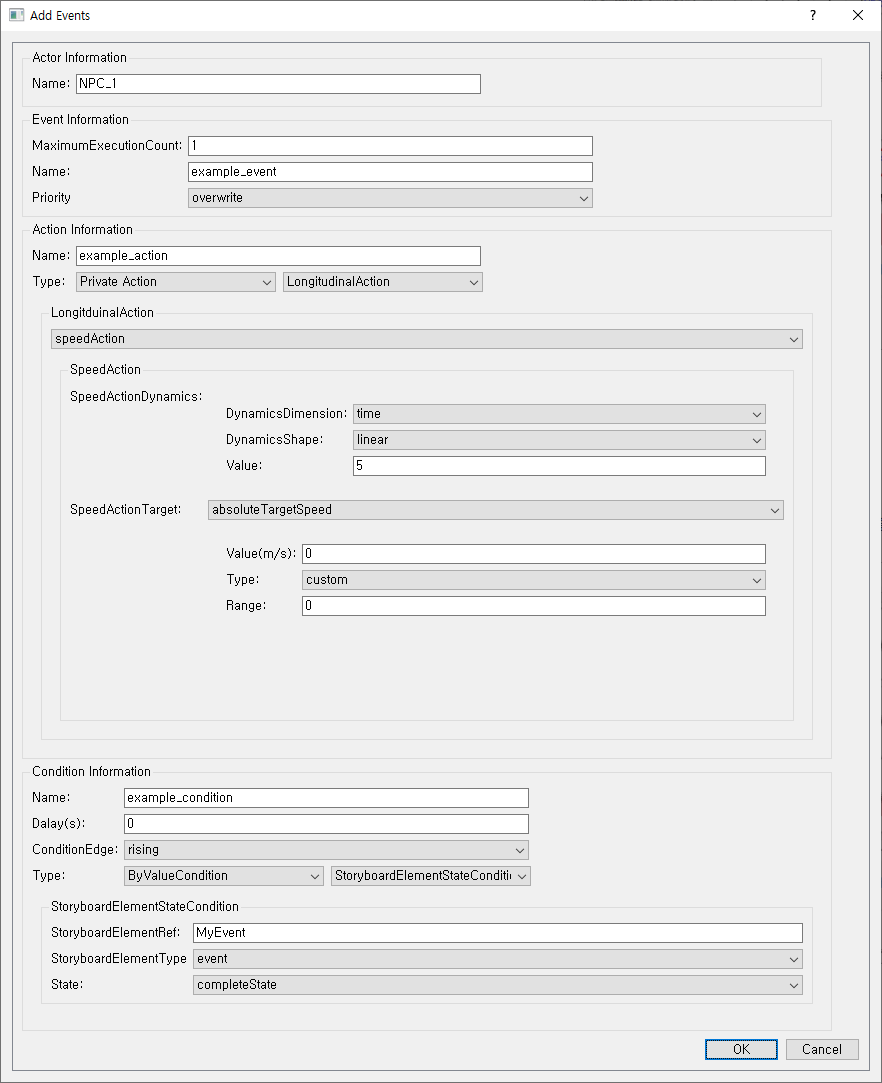
Scenario: When NPC_2 vehicle finished changing the lane (MyEvent changes the state to CompleteState),
NPC_1 will stop for 5 secs.
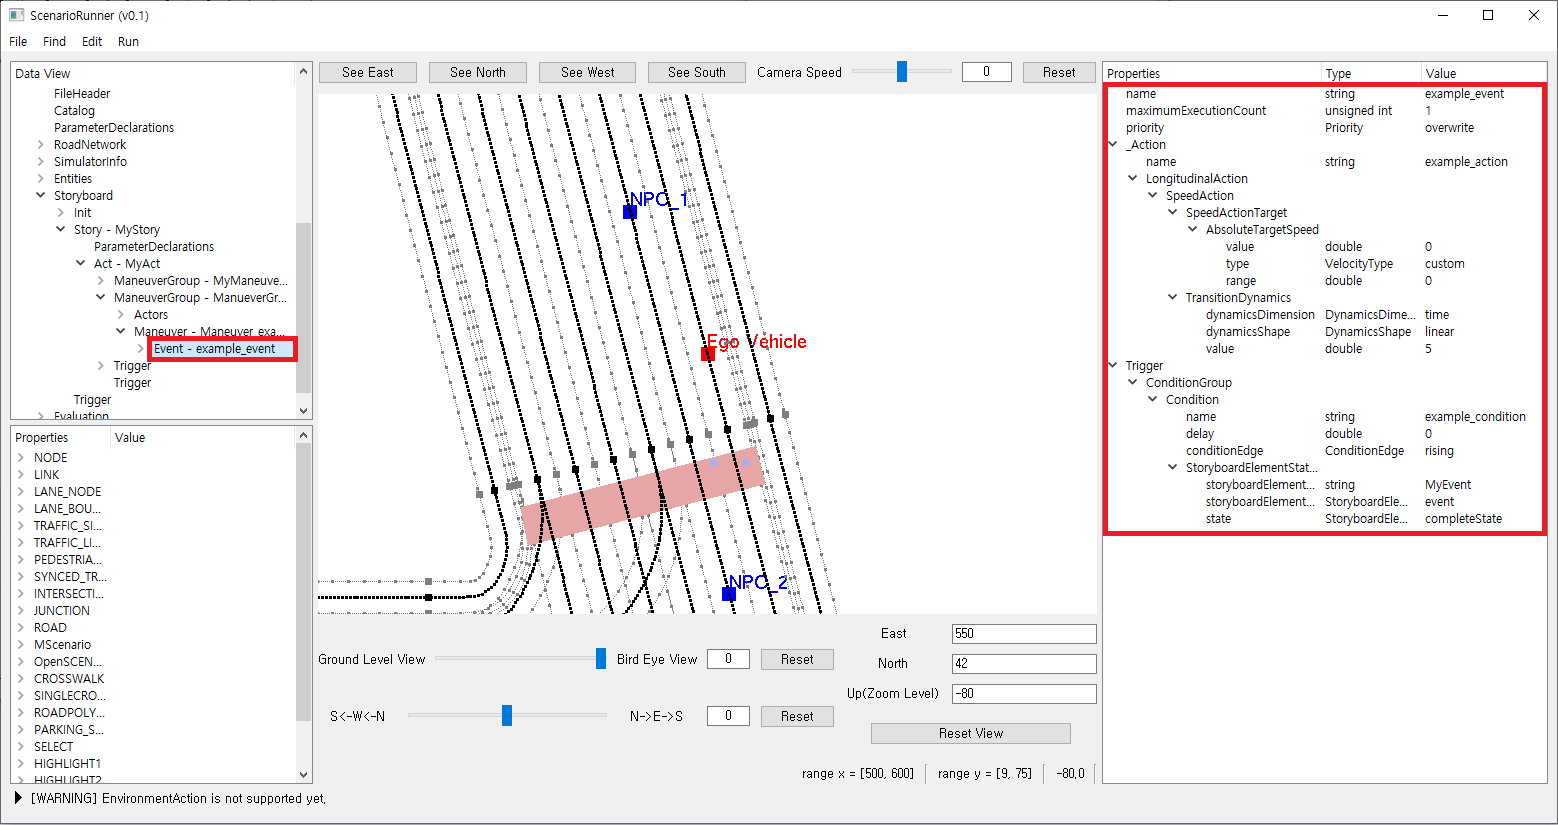
Completed creating a new event element
Editing & setting the Route
The vehicle or pedestrian route is also an important factor in OpenSCENARIO, this will enable vehicles to travel within the route as well as reach a specific position.
Creating the route
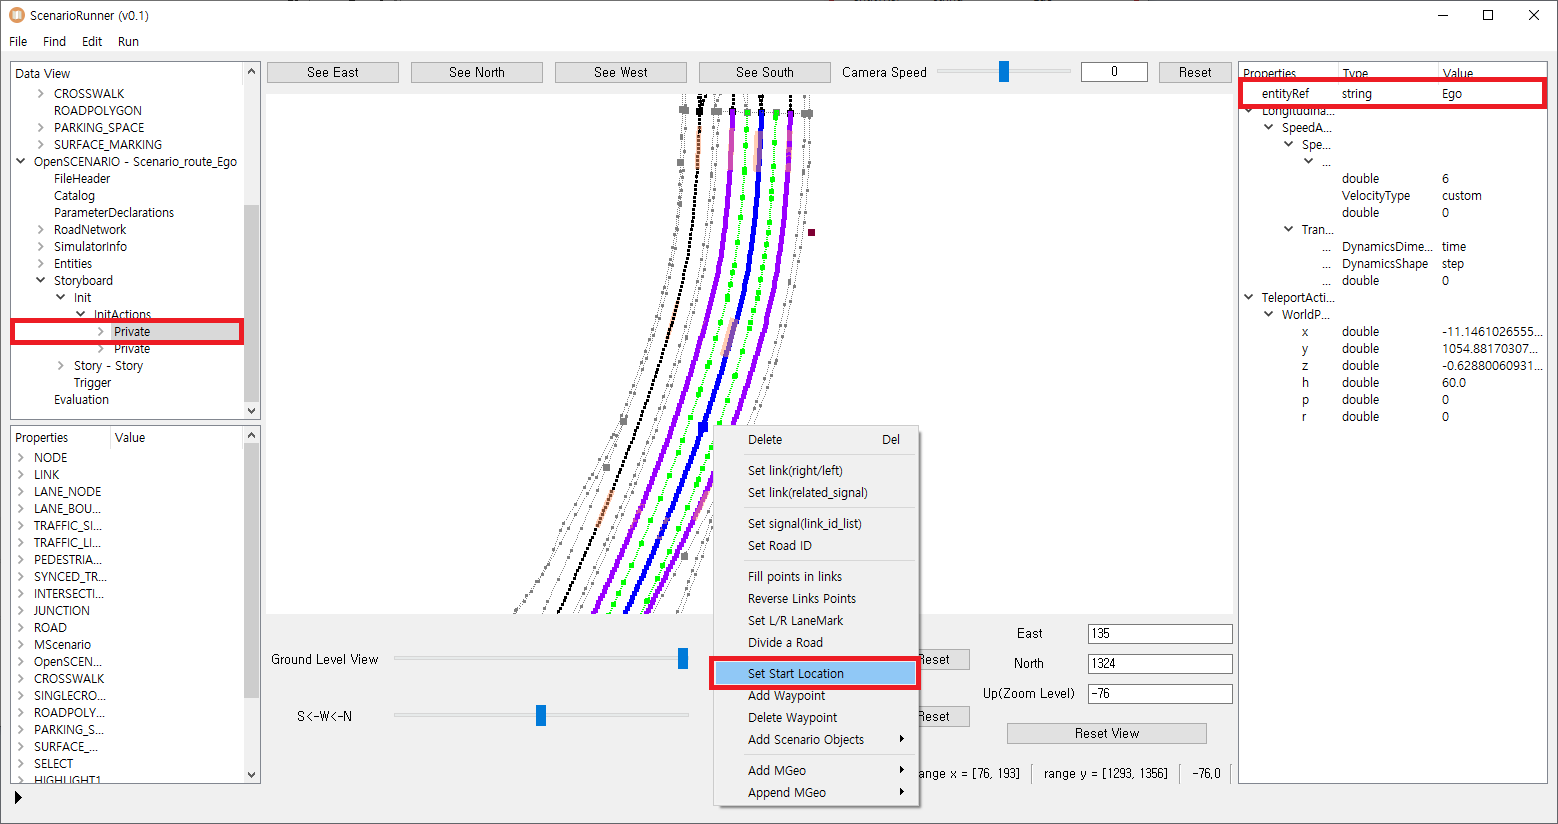
To set the route, click the
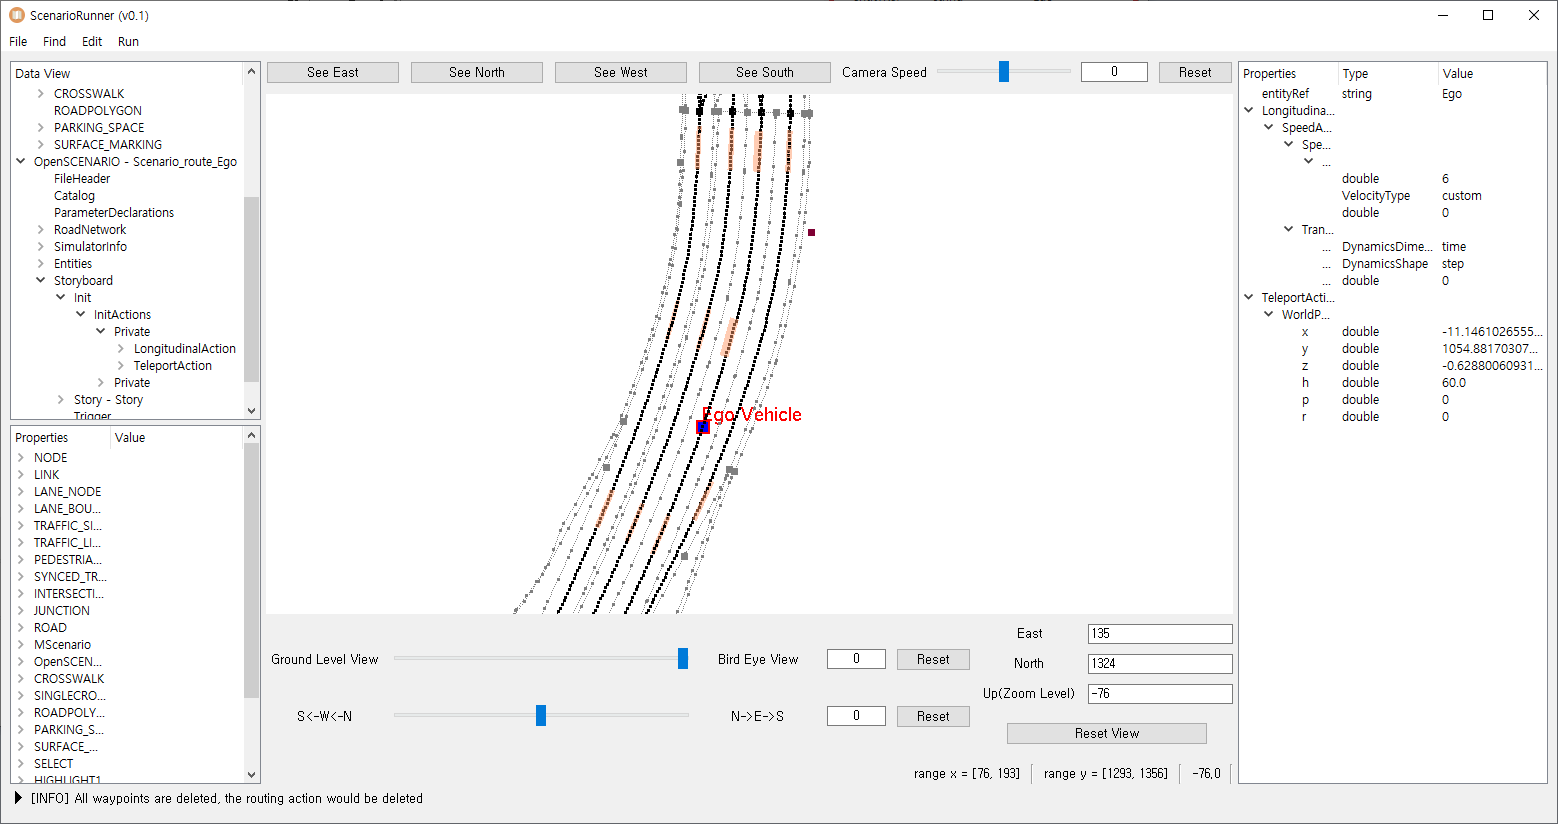
Privateelement associated with that route and the vehicle.Select the point at which the vehicles start driving by using the keyboard input (up/downs) after clicking the link.
By right-clicking on that point, click the
Set Start Location
Once the vehicle’s initial position is set, setting the start location is unnecessary.
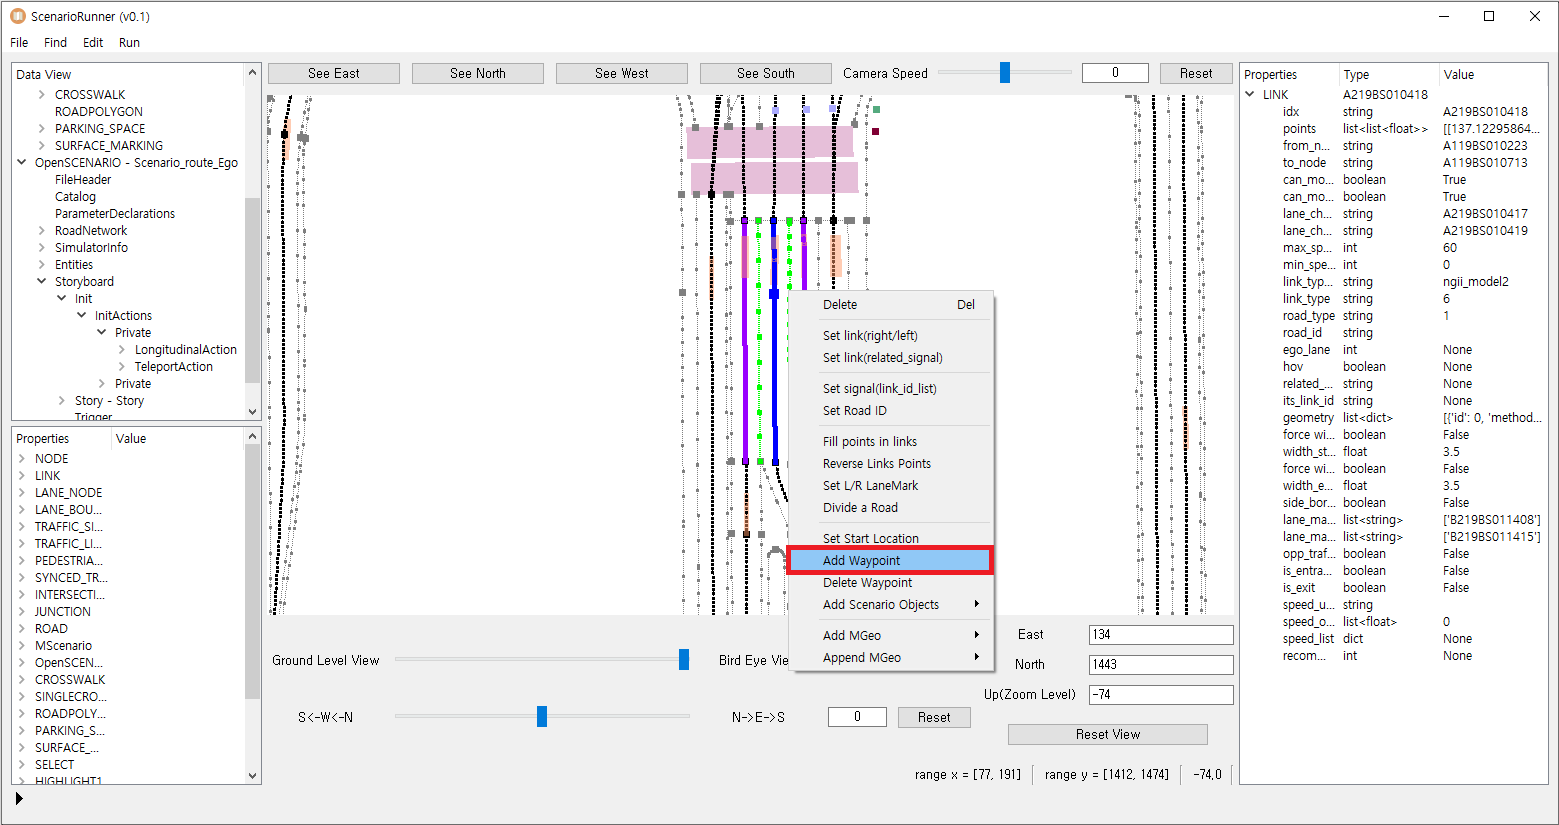
In the same way, as shown above, the waypoints in the route can be added by using right-clicking on
Add Waypoint
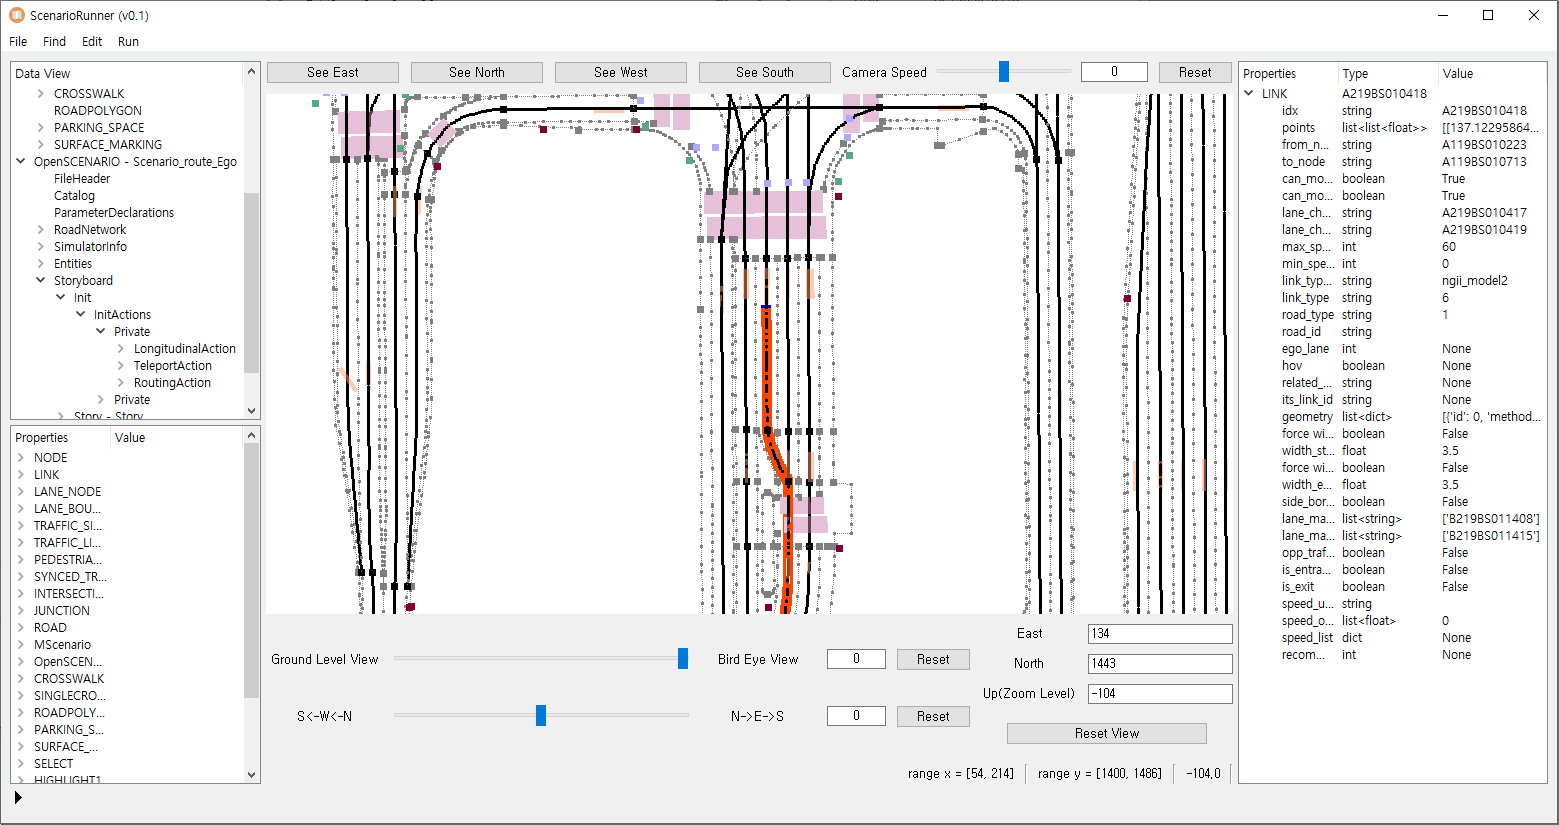
The color of the Ego route is red, and the NPC route is blue
If the waypoint kept added in the same way as above, the last waypoint would be the destination point. In between the start location and destination location, the routing strategy is set to the shortest path.
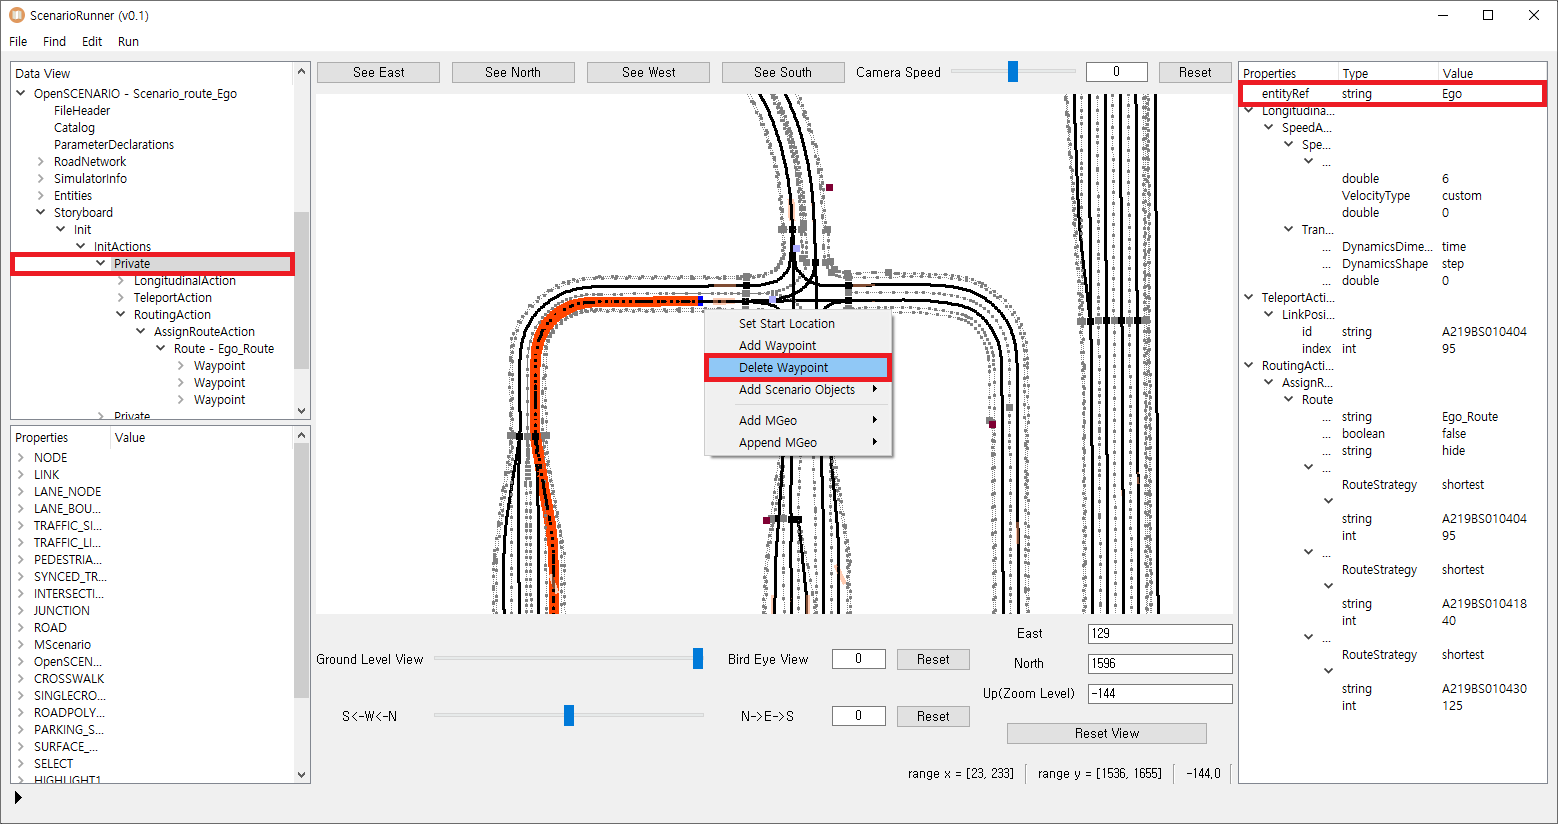
Deleting the route
To delete the route, click the
Privateelement associated with that route and the vehicle.Using the right-click on the link, click the
Delete Waypoint
If the number of waypoints is less than two waypoints, the routing Action element will be deleted. Otherwise, waypoints will be deleted in order.
Editing the Element attributes
On the
Data View (top-left), click the element or its parent element that includes the attributes.Then,
Property Viewshows the attributes of elements as well as its child element.
Double click the attributes you would like to edit on
Property ViewOnce you edit the value in that element on the pop-up, click ‘ok’ as shown below
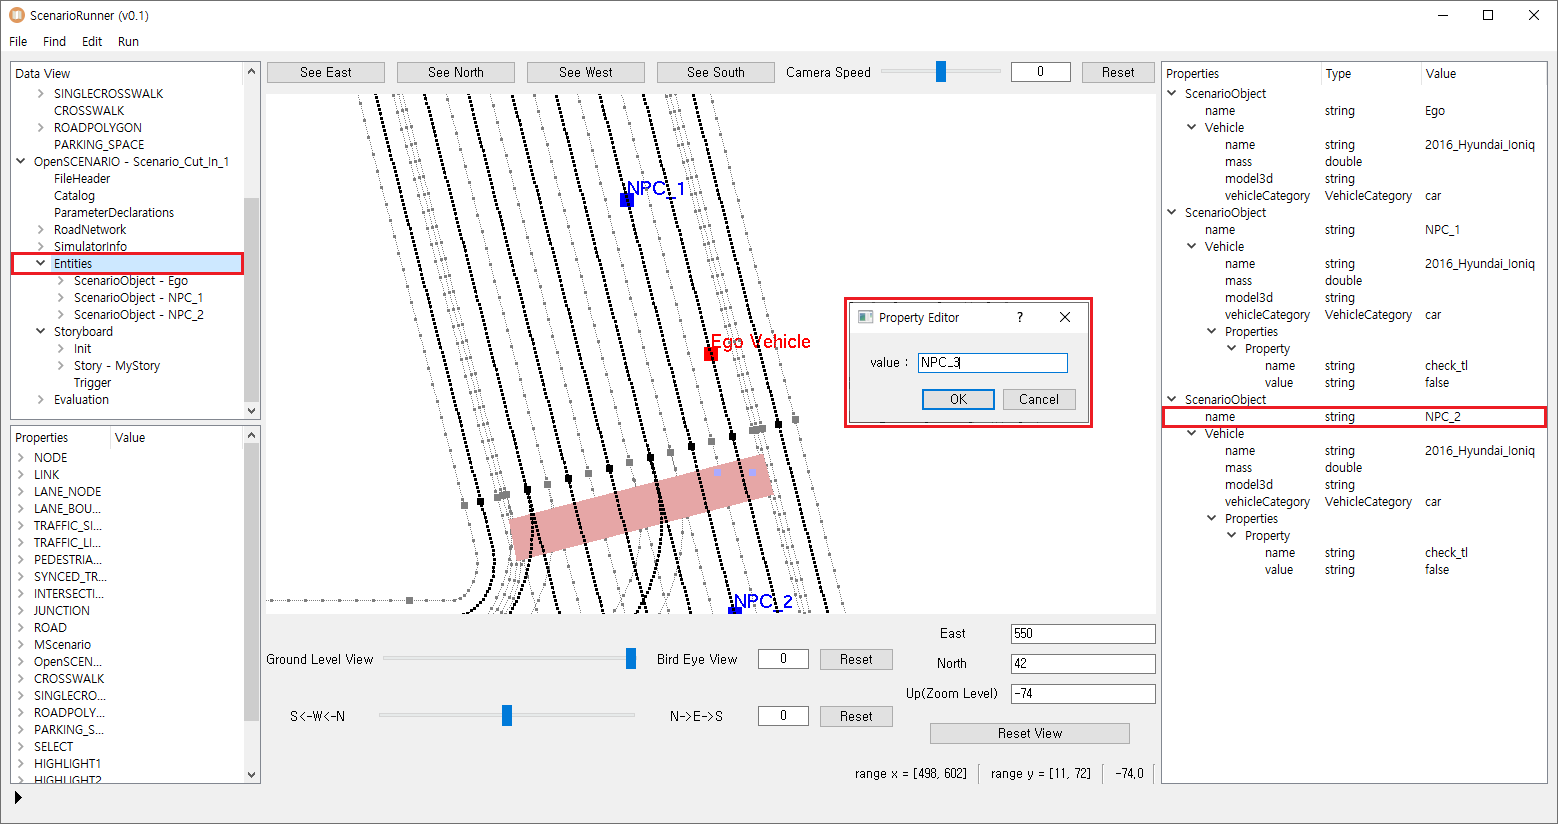
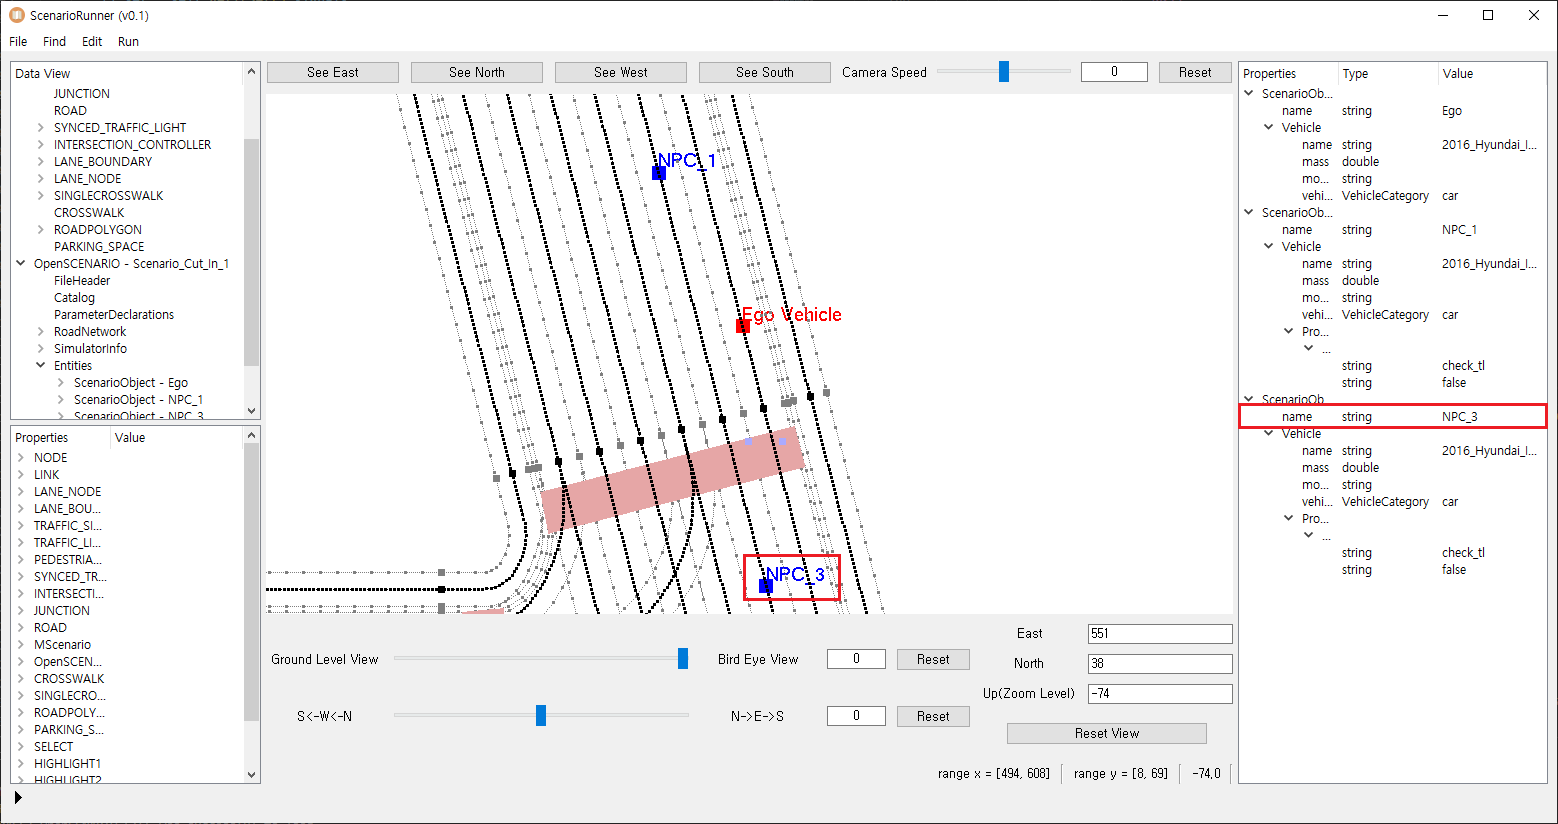
Ex. Change the attributes of the Scenario Object Element Properties View
Deleting the elements
On the
Data View (top-left), select the element you would like to delete, and clickDeleteClick ‘ok’ on the pop-up
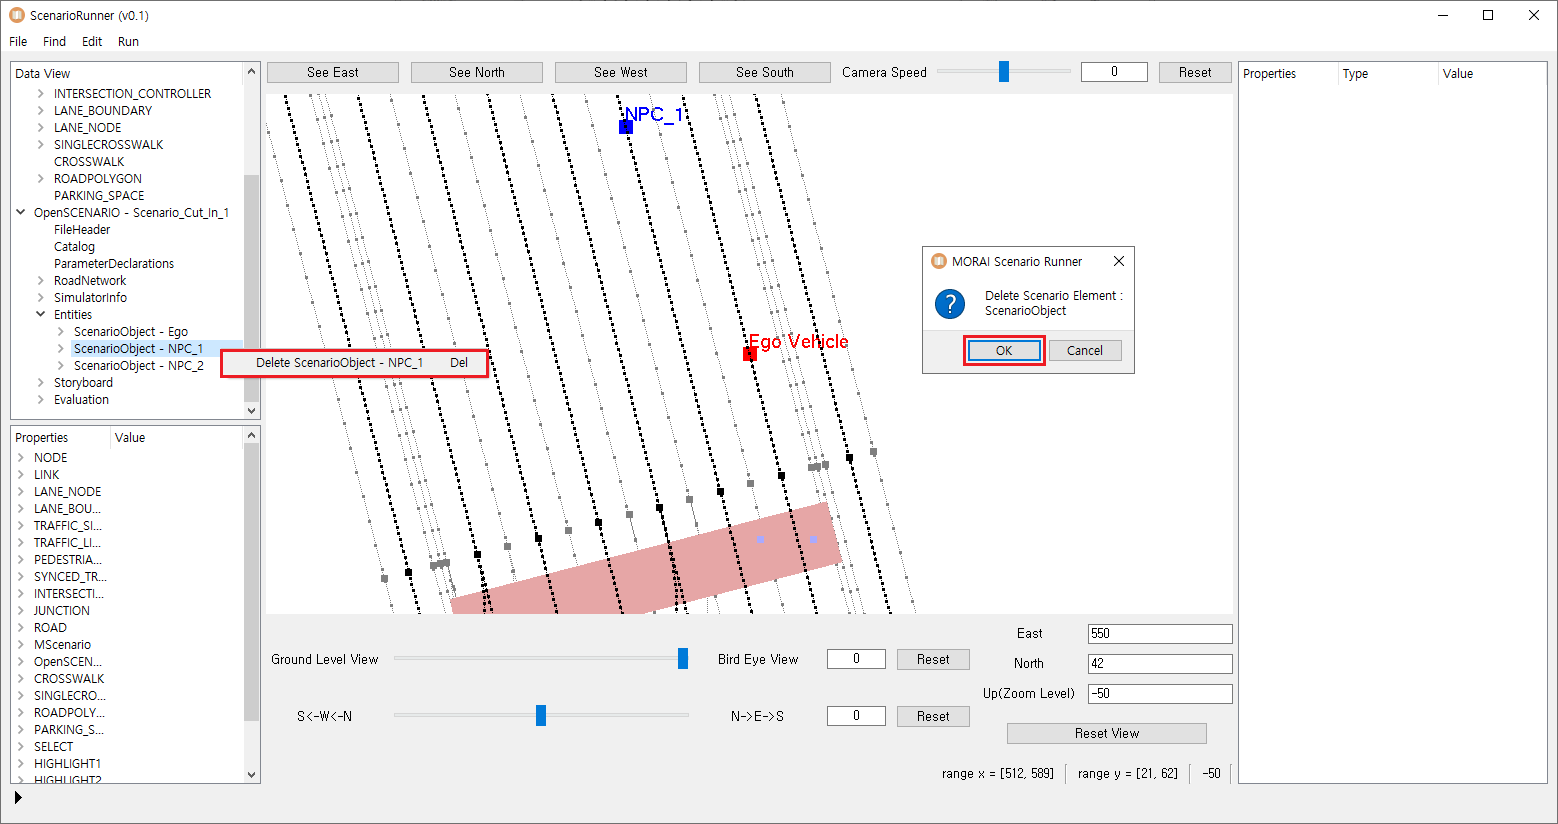
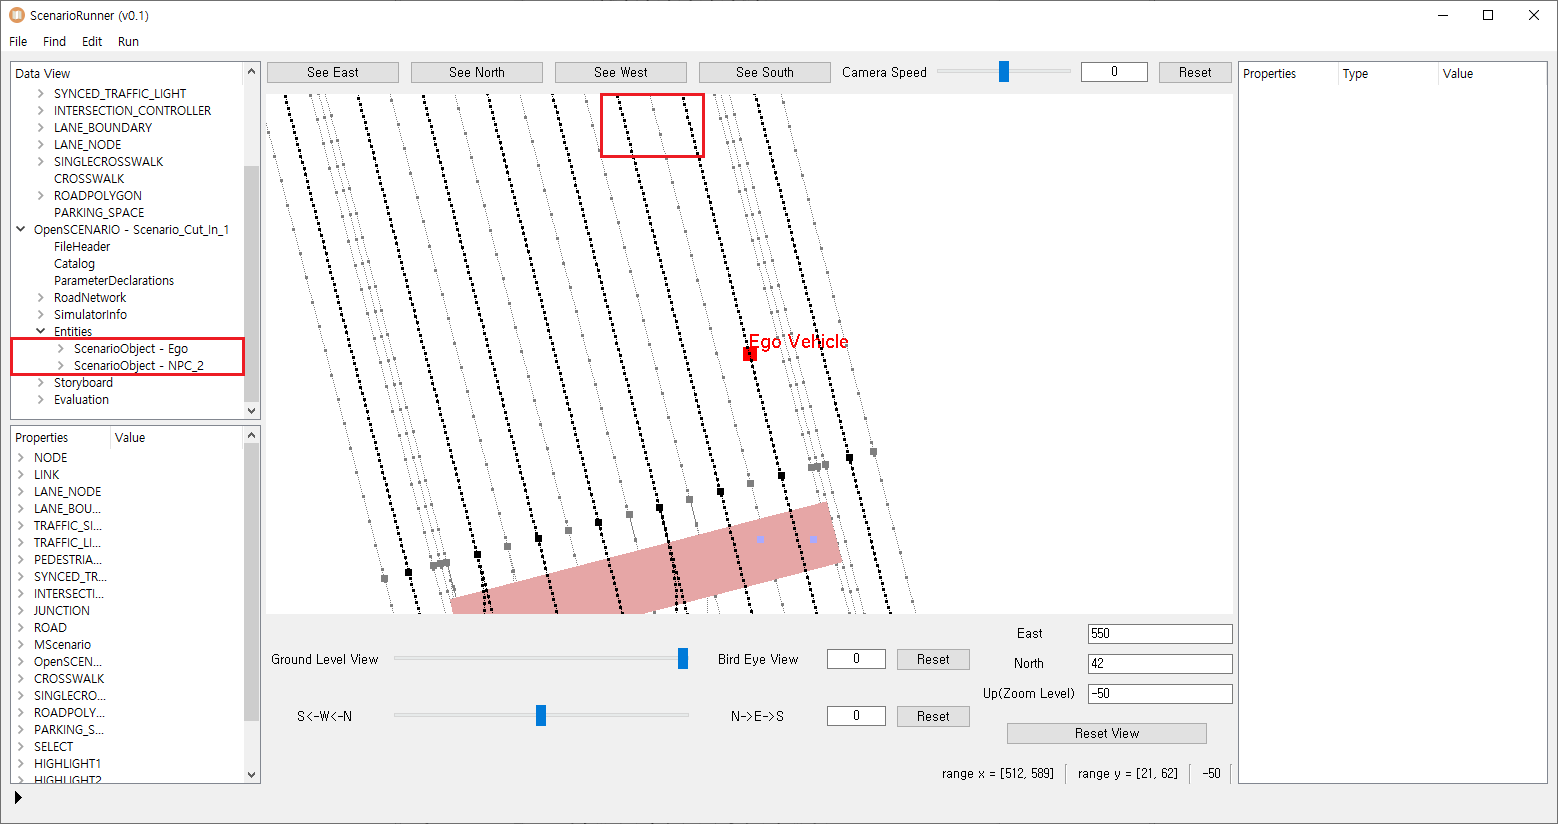
Data View 위젯을 활용한 요소 삭제
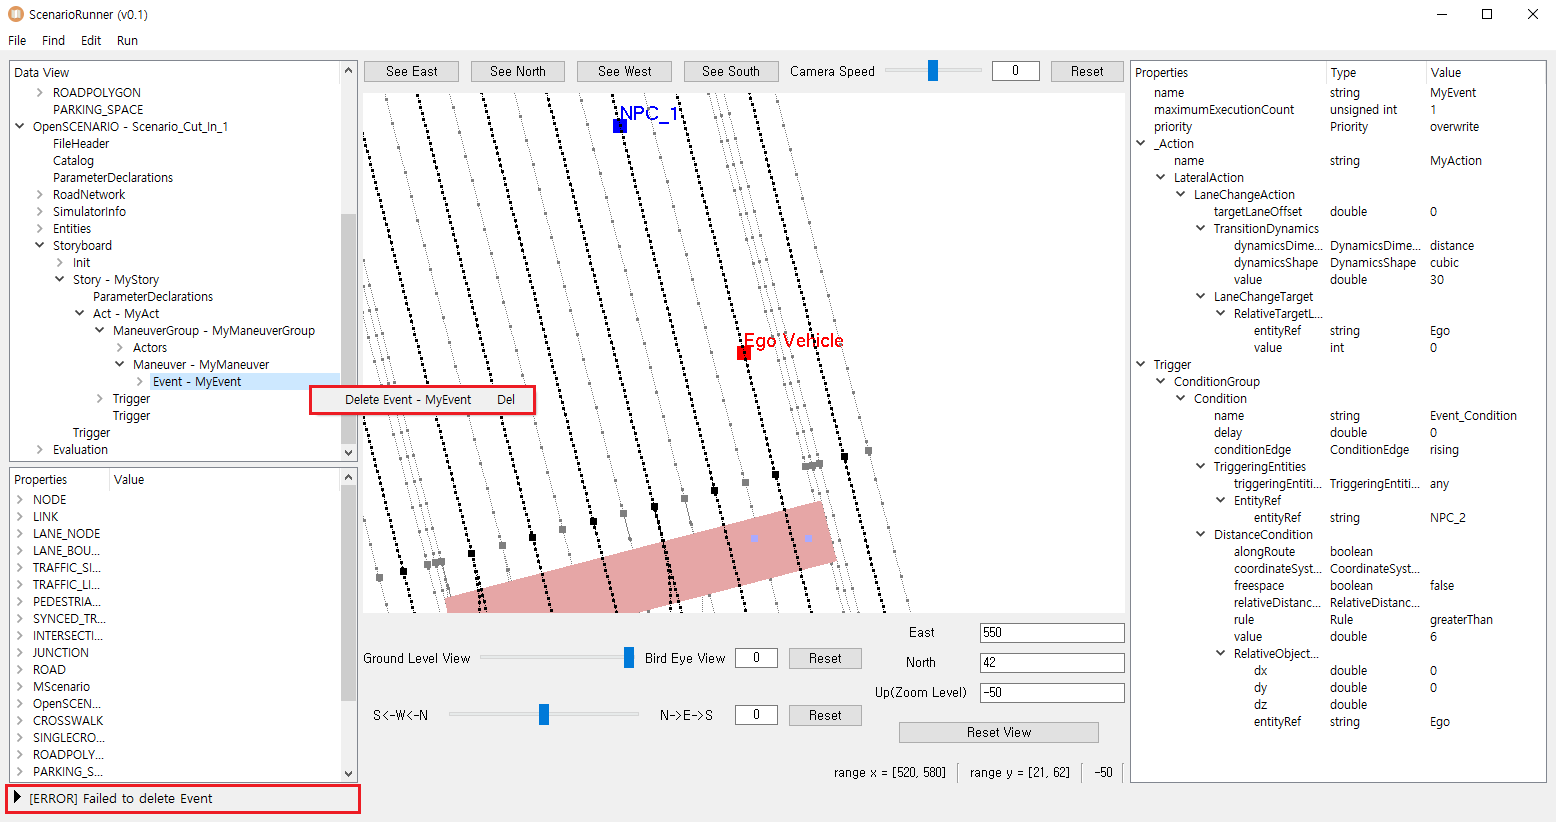
In case of the element not being able to be deleted, there will be an error message saying that the item can’t be deleted.
There are some parent elements that defined by OpenSCENARIO require a certain child element, in that case, the element can’t be deleted.
